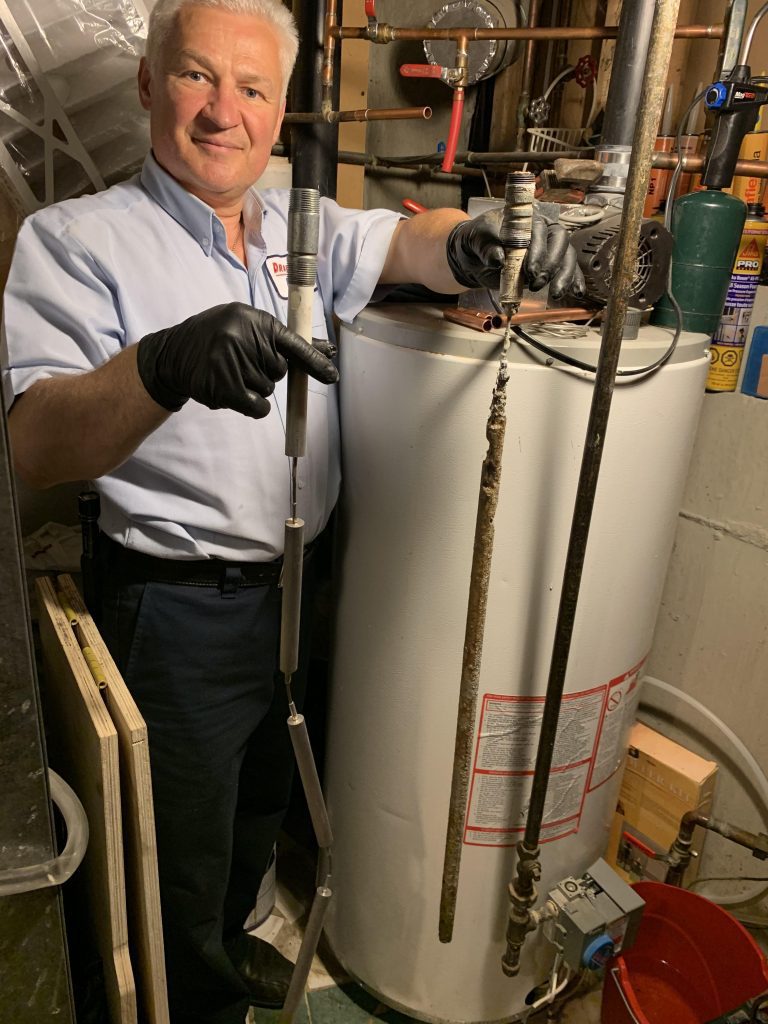
If the hot water coming out of your faucet is smelly or discolored, chances are good that something is amiss with your magnesium anode rod is bad. Not only does it emit an unpleasant odor, it’s no longer protecting the lining of your hot water heater. Replacing it is definitely in order.
Anode rods go bad about every five years so if yours hasn’t been changed for a while and you suspect it’s going out, it probably is. Read on to find out all you need to know about magnesium anode rod installation…
What is an Anode Rod?
Water heaters are made of steel which tend to rust and corrode. Most have a glass lining to protect the steel from corroding but when the lining gives way, the steel is subject to corrosion. If the corrosion interrupts the functioning process of the water heater, it can leak and even explode. An anode rod is a steel core wire device that is placed inside a hot water heater as a temporary solution to act as a protective barrier to release electrons into the tank, thus slowing down the corrosion process.
It is imperative to note that an anode rod is not meant to be permanent. They have to be changed out periodically. You will know it is time five years have gone by since you switched the rod out last or if the water becomes stinky or discolored.
Anode rods can be made or aluminum, magnesium, or zinc.
Why Choose a Magnesium Anode Rod?
Magnesium anode rods are the optimal type to use if you are in an area with soft water. While aluminum anode rods are typically cheaper than magnesium rods are, they don’t last as long or function as well although they may suffice if your water is hard and has a high PH. Zinc is usually only used in water heaters that already have dissolved. For the ultimate benefit, magnesium anode rod installation is considered to be the best rod of choice.
Magnesium Anode Rod Installation
If you are planning to install a magnesium anode rod yourself, follow these steps to ensure the job is performed correctly:
Testing
Loosen the rod with an air compressor, a ½ inch drive impact wrench, and a 1 1/16 inch socket. Turn off the power or gas and then close the valve to the cold water at the top of the tank.
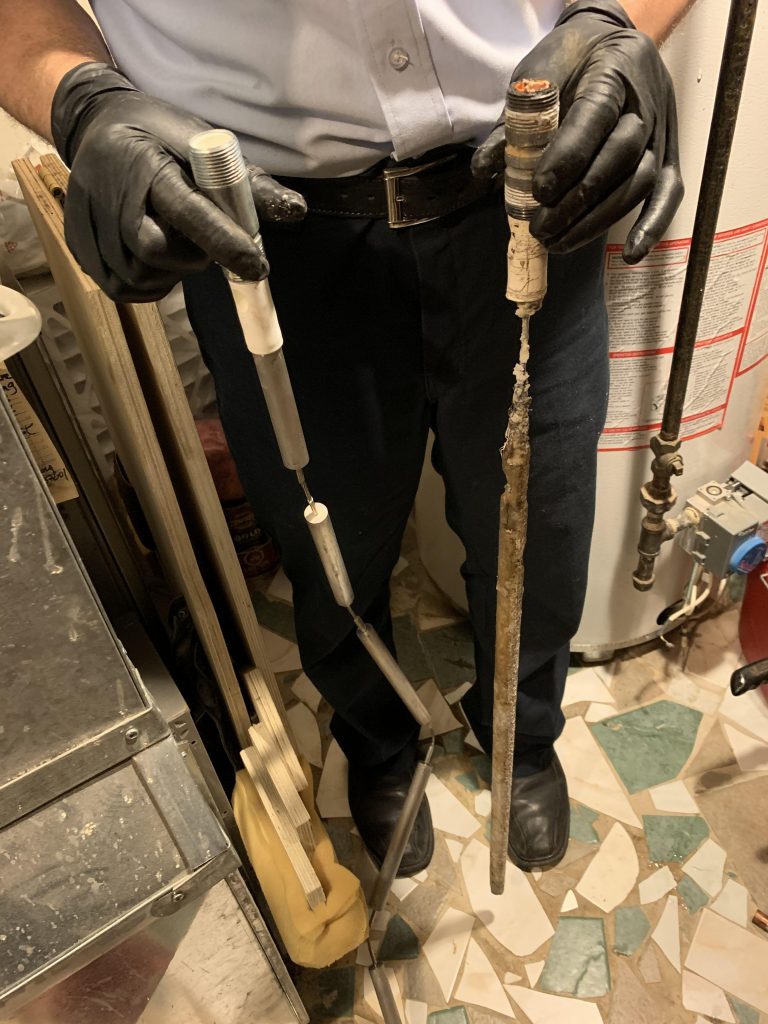
The hex may be under a plastic cap. You will want to pull it out and check its condition. If it is in poor shape, a new rod is needed.Another testing method is to drain out several gallons of water and check for rust or discoloration. If you note any or if the water smells rank, it’s time to change the rod.
Installation
Shutting Off: As when inspecting the anode rod, you will need to turn off the power (circuit breaker) or thermostat if you have a gas model. In the event your gas water heater has a vacation mode, that can be turned on to accomplish the same thing and will prevent needing to relight the pilot after the installation. If you have a valve on the cold water line, turn it off and if not, turn the water off at the pump or meter.
Locating the Rod: The rod is located on the top of the unit at the side. It may be connected directly to the line for the hot water. If you still have your user manual, you will be able to see how your water heater is set up. Otherwise, you can go online and check the manufacturer’s website for a diagram.
Drain: To drain the tank, connect a water hose near the bottom of the heater and run it to an outside location that is preferably lower than the tank is so it flows freely. Drain about 10% of the water if you have a top mount and a little more if you have a side mount. Old rods can be very difficult to remove and having extra water weight will make it even more so. That is why it’s important to drain the tank some. Water won’t drain until the drain valve is open and a hot water valve is also opened. If you turn on the hot water faucet near the water heater, you will have faster results.
Remove: In order to remove the rod, use a socket or boxed end wrench. If it won’t turn, use a socket and breaker bar. Tighten the rod slightly to break it free if necessary. Never use fluids like Liquid Wrench, however as they can contaminate the water supply. It is a wise idea to have a helper to hold the tank when going through the removal and installation process to help prevent twisting the water heater and causing damage to it.
Install: The actual installation is next. If your clearance is limited, you may need to use a flexible anode rod but either way, the idea is the install a new rod. To do so, point the threads downward and wrap them with plumber’s tape or very lightly cover them with joint compound. Insert the rod, turn the component clockwise until can’t be turned any further by hand. Then, tighten it another half turn with a socket wrench, being careful not to allow the water heater to twist or turn when you are doing so.
Restore: With the drain closed, turn the cold water supply back on. Open the hot water valve and allow the air to come out of the tank. You will hear spitting or hissing during the process. Check for any leaks and if there are any, make the repairs. Restore the power or gas and turn the water thermostat to the desired temperature.
Too Much?
Call Drain Rooter Plumbing at (416) 477-4755 for Magnesium Anode Rod Installation easy as 1 2 3!
Brand new Magnesium Anode Rod and old Magnesium Anode Rod